 ]]>
]]>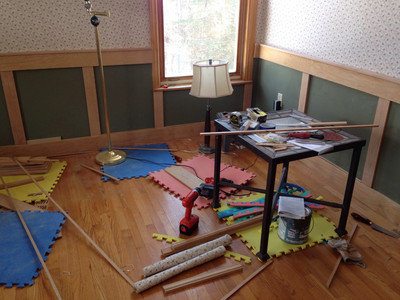 Back at it. Maybe I should tidy up first!
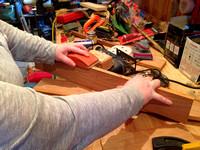
For some reason i started with the angled corner which I think was keeping me back. After a couple of nasty joints on the top trim boards, I guess a few tiny messy bits on the bottom won't matter very much. I think it will be ok. Tiny drill, tiny nails - still need to find a tiny nail punch.
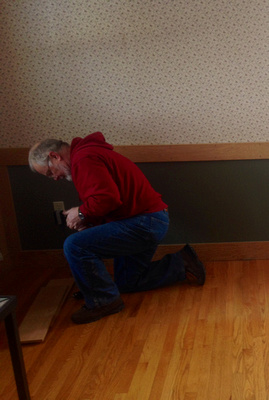
The hardest part is getting up and down from the floor.
 Looks ok from here.
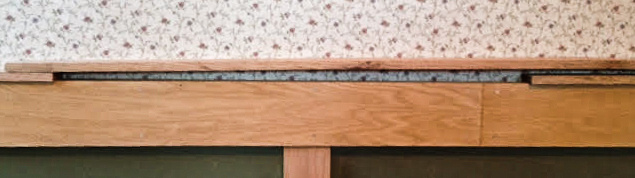
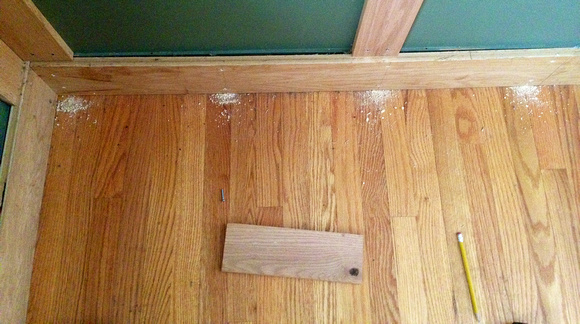
 Teeny tiny nails.This bit of oak is 1/4" thick
 That's the nasty bit.
I am still frustrated by the disgusting mess of my Fibre-Op installation which will eventually have to be placed in some sort of cabinet, but will need some protection from the sanding dust in the meantime. I also have to do the battery replacement when I settle down to it.
The sanding is pretty simple - Tomorrow might be a good day to finish that. done
==============================================
Step 2 will be drill, nail and glue these pieces on. I hope I figure that out correctly. I don't really want to screw and countersink and fill. done
Step 3 will be to figure out if I have enough narrow pieces to make a border along the top. This may require some saw work on the leftover pieces.
Step 4 will be to measure, cut, sand and fasten the 2 pieces along the bottom. This will be fussy.
Step 5 will be varnish and filling the nail holes
==============================================
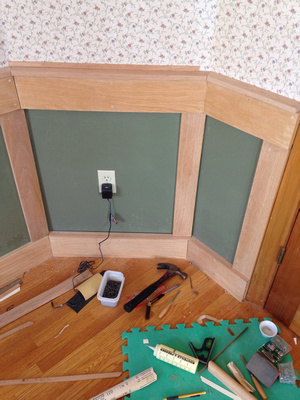
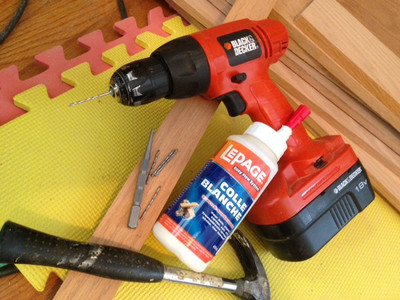 Tools of the Day
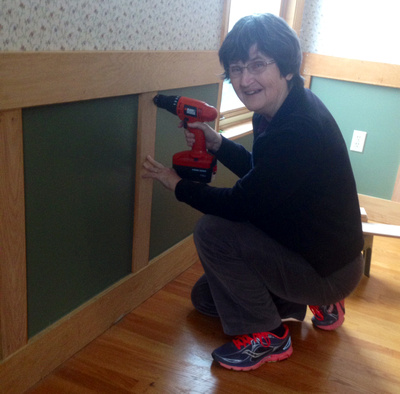
Friday: I am impressed with myself. Today I gathered my tools and set to work and the top rail regardless of my intimidation with figuring out drill and nail sizes to make it work. I just took a wild shot and it seems ok. I am disappointed in my joints - I need a better tool or a better strategy. However, a little filler will help I hope, and who's going to examine them anyway.
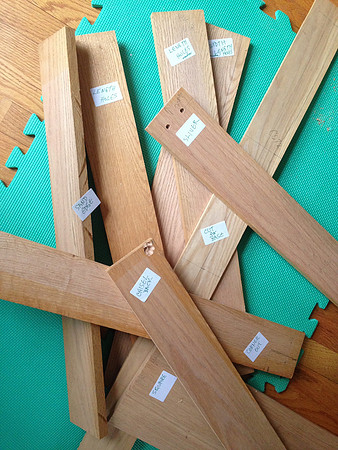
These play pads make my physical joints quite happy as I kneel on the floor to do the drilling.
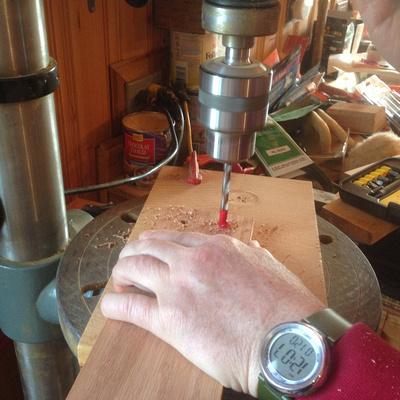
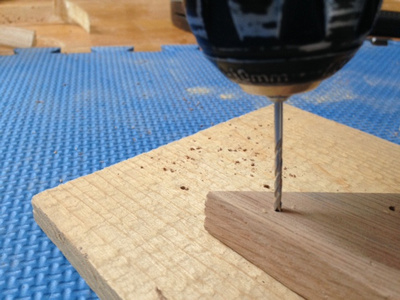 Drilling a Lot of Holes
Drilling the holes was an easy job. I put a piece of softwood underneath and drilled until I felt the drill go through the top piece. Sometimes the drill continued past the bottom, and past the foam sheet. I now have several small holes in my hardwood floor. Duh. I thought of this about 3/4 of the way through the job, and put a second board under the softwood. Dumb.
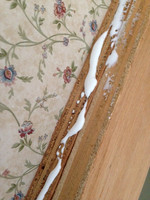 Glue
Glue. It is possible to use too much glue. This I discovered on the first glueing, and added a wet cloth to my tool supply.
Glue
Glue. It is possible to use too much glue. This I discovered on the first glueing, and added a wet cloth to my tool supply.
The first 1 pieces are on. I think this will go ok. By the end of the day, with several stops to follow the inauguration, I was done....except for a tiny piece between the windows which I forgot about, and which I think ended up in the basement earlier for a sample piece. Tomorrow.
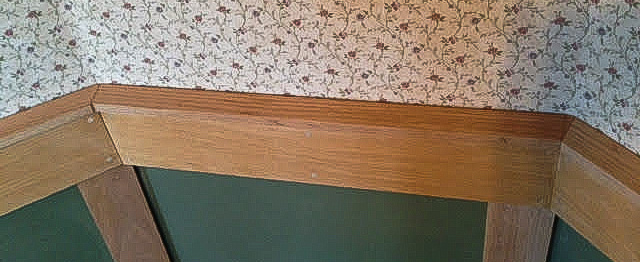
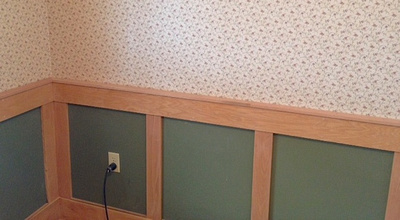 First 2 are done!
 The last piece
What this means, of course, is that I have managed some mitres!! Even that pesky corner wall.
The last piece
What this means, of course, is that I have managed some mitres!! Even that pesky corner wall.
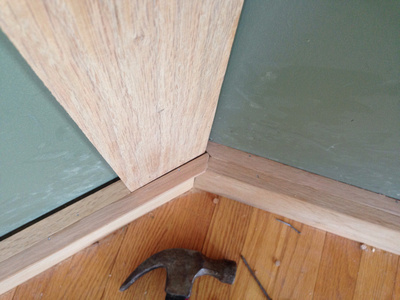
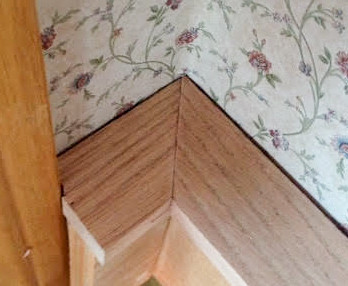 This is the best one.
 Hopefully it will look a bit better once it's nailed down.
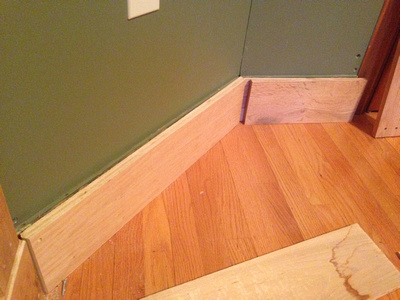
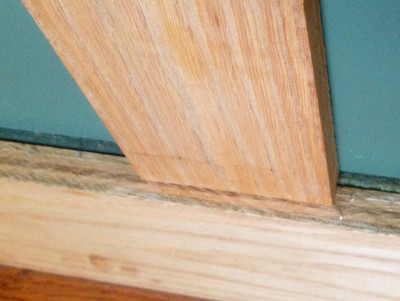
This is the best of the corners, and below is the corner wall. It's a little wonky to begin with, but I think this will be ok once its all nailed down.
The not-exactly-level wall behind it, can be fixed with a little strip that will look like it belongs there.
It's very treacherous in the room right now, the floor has a lot of sawdust on it -- so be careful if you decide to visit.
]]>But what has got me excited is the 'hard' part about to take place.
Today I fashioned a jig for cutting narrow strips, which will probably be needed to cut pieces from the short boards I have, since I don't think there will be enough stock for all of the pieces I need to come from the long boards.
I also did a LOT of thinking about process....and a LOT of measuring.
 Measurements and muddles.
What I have to work with are a number of short leftover boards ranging from 2'-3' in length, 2 oak boards approx 3' x 11', and 1 oak board approx 2" x 8'.
Measurements and muddles.
What I have to work with are a number of short leftover boards ranging from 2'-3' in length, 2 oak boards approx 3' x 11', and 1 oak board approx 2" x 8'.
There are 3 things to be cut:
- The top chair rail which is the same thickness of the posts, about 9/16" by 1 1/4". I need about 30' of that.
- The inside bottom piece that goes on top of the plywood in between the posts against the wall,; it is 9/16 x 5/16". There are about 20 pieces, mostly around 2' long
- The outside bottom piece which runs along the length of the wall in front of the posts, also 9/16 x 5/16". For this I need some longish pieces, about 40' in all.
I spent a long time thinking this out, and the best way to make it happen. I hope my thoughts are helpful. Each of these cuts will have to be edge planed before going through the saw, and the long boards will probably have to be thickness planed before anything else is done.
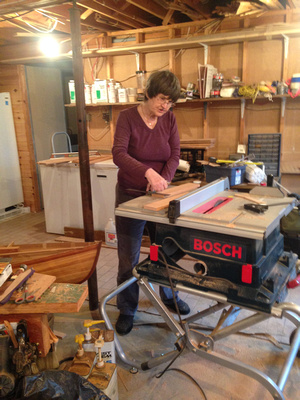
Well.....the best laid plans........
I changed my mind on the thickness of the bottom pieces, back to 1/4". Brian arrived and said we could cut 1/4" strips on the right side of the saw blade with no problem, so my jig-making was redundant. This worked fine up until the very last strip which was way too tricky for my taste. Because the jointer is not working, I need to sand those pieces by hand.
Unfortunately, apart from the first 9 strips, the rest of the day was disappointing because the jointer turned out to be not working - belt is off, and the bolts holding the top to the bottom were missing. I suppose I could have tossed them in my cleaning frenzy a few days ago. I would expect them to have been someplace nearby, and I moved almost all of the nearby stuff -- so Brian's visit turned out to be more troubleshooting and jointer fixing than making actual progress.
Nonetheless, I learned a pile of stuff from him about planing and cutting and what you can and cannot practically do. I will be having some joints in the top rail, and in the outside bottom piece in order not to lose massive amounts of stock due to crookedness. Might just need that mitre saw after all.
Woodworking as a practical hobby for me seems quite far off. There is way too much to learn and remember, such as the million kinds of bolts there are, and what a nut driver is and which knobs do what on the power tools. The jury is still out on whether I will be making this a long-term project.
]]>
On Wednesday I wrestled a few pieces of oak out of the garage, and decided I had enough for the chair rail, but I would need both jointer and saw to get it done - and maybe the mitre saw as well before it's over. On Thursday I sawed off the remaining plugs, put a screw in the baseboard where it was needed, and thought about sanding. That's as far as it got.
I muddled a lot over how to finish the baseboard, fitting something around all those pillars that are recessed from the top and bottom boards. Finally it came to me, so now I am ready to proceed with some new learning -- it's a little scary to tackle the jointer, but it's necessary. How hard can it be?
Friday I googled how to use a jointer/planer, and how to cut narrow strips on a table saw. (about which there are numerous opinions, mostly involving complex jigs, built or purchased) So, I commenced to construct a simple jig that I had googled for the latter.
There are a million jigs for cutting narrow strips. Some are fancier than others. Some you can buy on Amazon. My attempts to construct one were doomed for failure for various stupid reasons, mostly around being unwilling to use the table saw alone. In the end, I surprised myself by creating something akin to a jig by clamping a stick to the mitre bar of the saw. Maybe when Brian sees it, it will turn out to be a really bad idea. He's coming tomorrow to help me with planing and cutting narrow strips.
I also dug the planer out of its bed of extreme clutter in the basement and tidied up around the area so there would be room to plane those long pieces of oak. The planer is a mess, covered in sawdust and even some rust. That will be tomorrow's chore, to clean it up like new - so I will next be googling that.
This is midway through the process. I still smell a bit like WD40.
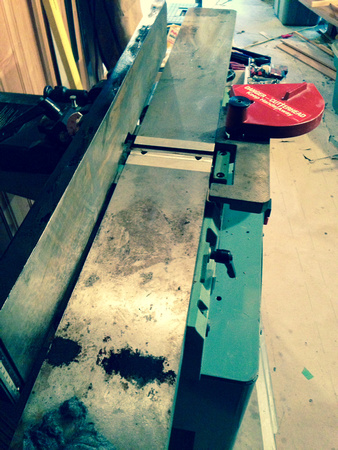 Cleaning up the Planer
]]>
I have to point out a stupidness factor, though. A few stores had the plugs with the rounded ends – not the mushrooms (they have those too) but the straight up and rounded ones. I don’t like the look of them, and I think they would be annoying to cut off – but Brian suggested genty that you can put them in backwards. DUH. Then they will hammer in and slice off as usual.
The good ‘bit’ about the plug-cutter, is that the plugs can be oak, and thus match the stiles. Awesome. I’ll be playing at that tomorrow as the snow flies – hoping to remember to match all grain direction.
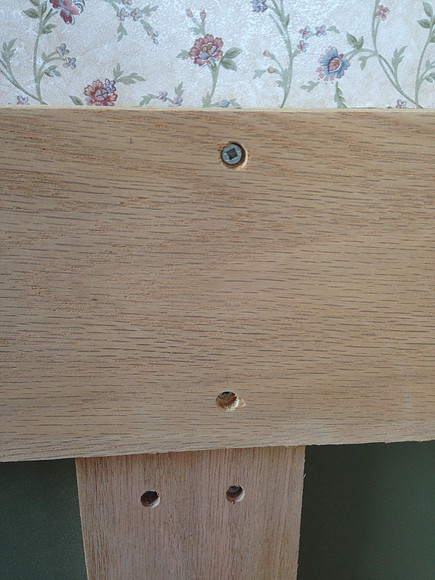
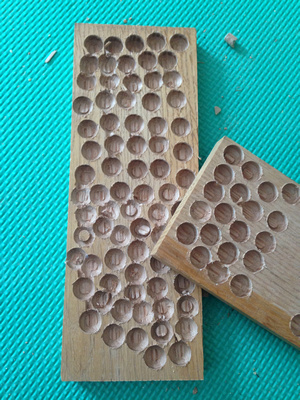 A Whole lot of HolesThis is what's left after the plugs are snapped out.
26. DONE: The maple plugs in the railing are all installed and sanded. Not too much scratching of the wood with the saw.
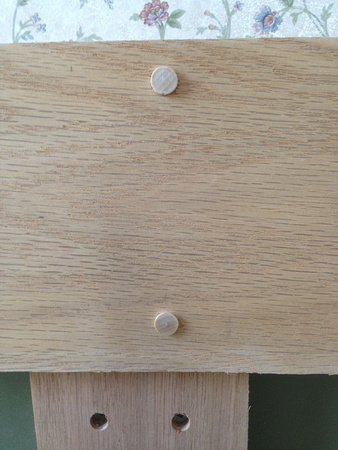
 Pretty, huh?Hopefully, this will mellow down a bit with varnish. If not, it's a damn fine plug regardless.
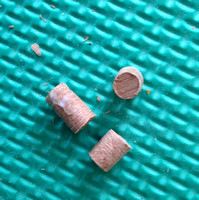 Here they are: 1/4" across
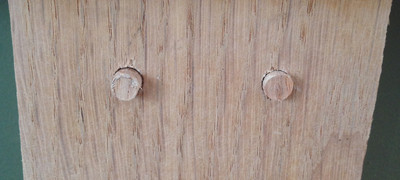 Waiting for Saw and SanderNot a bad grain match, eh?
27. DONE: The oak plugs are created and plugged into the stiles.
Austin helped with the drilling, gluing and cutting off of the surplus…he has a knack for that…while I managed to scratch some places quite badly. None of the saws works really well, and much worse on the oak plugs. Not sure I would use oak again – lesson learned.
28. UNDERWAY: Chatted with a guy at Kent’s and another guy at Home Depot regarding possibilities for mouldings along the bottom.
There are many options, most of which will have to use short ends of oak unless I use the long piece from the garage…or maybe there is a not quite to long piece there – must check that out.
My current favourite is to use corner moulding, 1”, slice off one edge to meet the posts, then fill in the back with thin strips of oak to fit.
Another favourite is to use a 2”-ish board on top of the baseboard, cut it out for each stile and let it overhand about 3/8”, with or without a strip running underneath. That could match the top (chair rail) piece.
29. UNDERWAY Inequities Discovered
There are a lot of things here that are not quite kosher, and won’t be.
- I discovered one whole wall and another half where the baseboard is held on only by a few finish nails. No screw or not to screw? I suppose by all that’s right and holy, those pieces should be screwed into the wall. I should have noticed that before.
- One of the angle corner boards is slightly misplaced wrt the joint on the base. C’est la vie.
- The oak plugs are not quite the same size as the screw holes. They should have been tapered, that might have made a difference, but the oak doesn’t give like the maple ones did, so I think when all is sanded, that there will be some little gaps showing……maybe not.
- There are a couple of stiles that are not screwed in. They are just the right length to stick between the top and the bottom. I think that’s ok.
- My personally crafted baseboard piece does not match nicely with its neighbor.
]]>
I had a rubber hammer to whack them in, quite an assortment of saws to choose from, and a sander to finish off the job. There are 72 plugs in the initial round on the top rail. I’ve probably done 20.
Mr. Wood on YouTube is right -- even the thin Japanese saws wlll scratch the surrounding wood. Skill or a different saw? Not sure.
 BEFORENote that this is the part that Harv did, hence the plugs match the screw holes. Lucky me.
 Plugs pounded inThere's a little glue in there, too. A savvy person would notice that I forgot to line up the grain.
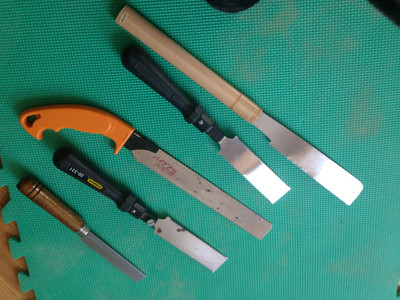 Nice selection of saws.
 Sawing off the top
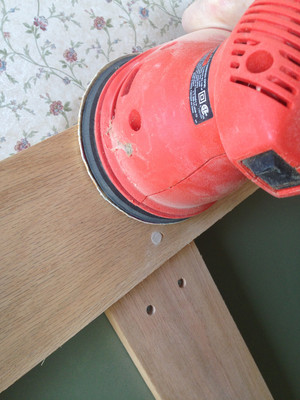 Cleanup
That's all for today. Tomorrow I'll finish this, and hope to buy smaller plugs for my holes.
]]>
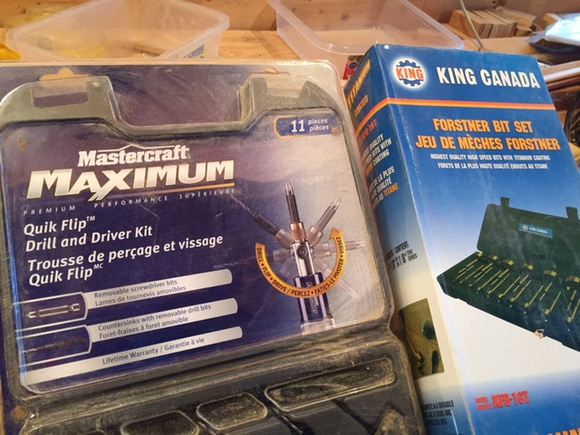 Fresh FindsI knew there had to be countersink bits here someplace. I did not expect them to be in unopened boxes.
22. DONE: Every screw that needs to be screwed is screwed. I think that counts as a milestone.
23. DONE: The wonky corner issue is solved.
Happenstance. I removed the stile from the wonky corner, and suddenly everything looked right. Less work, not more.
 Doesn't look rightPlan: Fill in the green gap
 Improved versionTook away the post to insert narrow strip. Looks way better. Less is more.
24. DONE: The sticky-out end problem is solved.
My sister Berta suggested covering the sticky-out ends (where the top rail extends beyond the window and door frames) with a half- round moulding. (I hope they make those. I think it's called a nosing.) This is so much more elegant than simply covering the plywood with a thin piece of oak. Brilliant. I hope it works. There are many advantages to have gone public with this project.
 Sticky-outy bitOn the left, extends past window casing.
25. UNDERWAY: Sanding off the pencil marks
The basement clean-up momentum has discovered several sanders of various vintages, both had and electric. There is also at least a gazillion packages of sandpaper and disks. Especially 80 grit.
It was a simple matter to sand off all the pencil marks from the top rail and the posts, but the baseboard will require a bit more care so as not to sand the hardwood on the floor. A nice metal ruler, maybe.
]]>
I think I am in for a lot of cogitating as I consider that messy window corner, and the upcoming design for mouldings and chair rail configurations, especially around the windows and doors where the design is a little wonky.
I just googled Home Depot mouldings, and there are 29 pages under the chair rail heading, and non with an overhang the same width as mine.....
18. DONE: Finalize all the stiles’ lengths, holes, and screw in everything that does not require something else to be done first.
I thought there were four posts still to be done, but I miscalculated for various reasons, and I think there were 7 that needed some attention.
Trish showed up to help this morning. It is so lovely to have someone with some mechanical sense to work with. She can figure out stuff, like how to work a weird clamp that I never saw before. She sanded off some oak-burn marks while I adjusted lengths and holes on specific pieces and cut some stock for that elusive missing baseboard.
After school Austin arrived to learn and help, also with a quick understanding and a lot of mechanical instinct. How inspiring to have a teenager as a co-worker.
Truthfully, they are not quite all screwed in because at some point the small drill would not go through the Masonite, and it was too late in the evening to figure out why. Maybe it’s just dull.
 Today's AgendaA bit of basement work involved here.
 Need to find a way to cut this
 The obvious choice
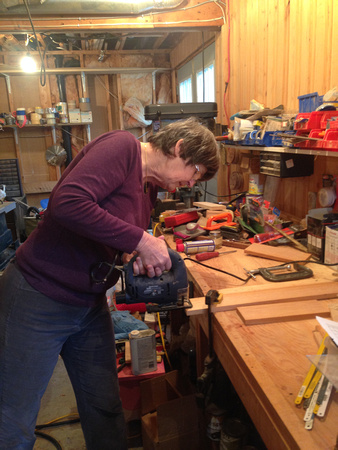
 Trish gets some sanding done
This was a very successful day, though, and all this included:
- Cutting 2 new pieces for under the front windows
- Chiselling out hollows for the protruding screws where the Masonite joint is
- Cutting out a space for the Fibre-op wires
- Shortening and moving hole positions for a few pieces
- Sanding off burn marks on the edge of one piece
- Cutting a post to the right width from an errant piece of wrong-sized
- Squaring and cutting the baseboard piece, getting it wrong and starting over.
It also included:
- Finding the scroll saw; finding it to be out of blades
- Finding a jig saw c/w blade
- Finding unusual clamps and experimenting with holding down the board to be cut
- Finding sandpaper; leading to finding an electric sander
- Fussing with the saw fence. Why does it not slide nicely? Moving sawdust does not help.
- Finding dull chisels.
Trisha knew some stuff that I did not, such as how the sandpaper sticks to the sander, and how to make the clamps work. She is logical about stuff like that (and is young enough to remember shop class). I am a clutz, and never went to shop class.
Austin was a quick study...a delight to have as a helper.
 First you have to draw the line
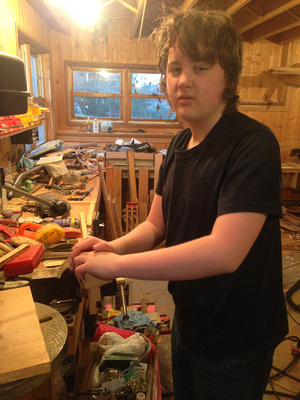 Austin gets an introduction to sandingDo you notice that workbench. I think a new project is brewing, to get that to be functional and organized.
19. DONE: Screw in the baseboard that was left loose from the wall.
This needed screw holes and countersinking in place with the hand drill. I talked about that yesterday, but today I collected the right bits and managed to finish the job. It was not brain surgery. But, you do discover things, like how hard is to measure bits of inches when you are lying in the floor .It was probably not even worth its own separate line in this blog.
 Baseboard CogitationThe loose piece (left) and the one being invented (right)
20. DONE: Create the baseboard piece that was missing.
This involved experimenting with pieces of oak and miscellaneous scrap to get the right thickness, then cutting to shape and screwing to the wall. It took a lot longer than it should have. I actually stuck the backing pieces to the oak with scotch tape so they would not slip during the drilling. I don’t think that would be in the Fine Woodworking directions.
22. NOT DONE: Read up on how to install the safety guard on the table saw.
Trish is concerned about the safety of the saw. She googled the instructions and no doubt could now install it with her eyes closed. It did not get done, however.
I am really happy with today's effort. It is almost time for the attention to turn to seriously different aspects of the work.
The list is quite short now, but each item requires some new knowledge and skill:
Sand away the pencil marks, and any other sanding that needs to be done, edges, etc.
Fill all the screw holes with putty or plugs. This is a significant decision and quite a job I think.
Sand baseboard and top board
Figure out the corner by the window
Decide upon what type of molding for the bottom, and how it will be installed.
Buy it, cut it, fasten it on.
Find the chair rail and get more if not enough.
Figure out how to fasten it on, and install it. (Mitres!)
Varnish.
]]>
So I donned by dusty clothes and set to work.
12. DONE: Measure all the stiles, and drill all the holes.
Except for the one that the wires have to pass through, and one that will sit on the as yet missing base, I have measured, sawn, drilled pilot and countersink holes, and in some cases re-measured and re-cut for length. This is awesome! I have figured out how to change the bits in the drill press and to use the saw for simple cuts without stressing out.
I found myself cogitating again -- The boards that butt up to the doorway will stick out past the door frame, and it would be a fine thing if these were bevelled at the edge. I might get up the nerve to try and set the saw to do that....or not. You Tube will be consulted.
13. DONE: Screw in the baseboard that was left loose from the wall.
 Sawdust. Sign of work done.A careful eye will realize this picture was taken before the screws were put it to suck the baseboard in to the wall.
This needed screw holes and countersinking in place with the hand drill. I talked about that yesterday, but today I collected the right bits and managed to finish the job with longer screws.
14. DONE: Observe that this could be a weight-loss program.
There are a LOT of trips up and downstairs. There could be benefits far beyond getting the job done.
15. UNDERWAY: Place each board; drill hole through masonite; screw and countersink.
This was the bulk of the day's work -- the leadup with the tools, the measuring and levelling and drilling and screwing of all but those boards needing special treatment. I think there are 4 left. What a great feeling to see this major progress marker almost finished.
16. STILL THINKING ABOUT THIS: Find a bit of plywood and make missing piece of baseboard.
Given the amount of plywood and other wood in my basement, I am surprised I cannot see a piece of oak plywood about 6"x10" which is required to finish off the baseboard. I will probably have to make it from actual oak, and bastardize something to get it the right thickness. I suppose I could challenge myself to figure out the thickness planer, but I'm not sure I'm ready for that. Hopefully a bit of a search will turn up something. I will have to make a mitre, too, but the good news is that it will be covered with a moulding. The mitre on the moulding will be the actual problem down the road.....this one, maybe just a practice run.
There is also the issue of how it extends out past the door frame. AH-HA! This would be a good reason to use solid oak instead of plywood, and put a bevel on the edge. BUT, that would make it unbalanced from the other side of the door. There is a lot of thinking involved in this stuff.
17. DONE: Read up on plugging holes.
There are a million YouTube videos on how to plug holes with plugs, with putty, and how to make your own plugs. I wonder if we have one of those tools? I know we have some packages of plugs and a million chisels and Japanses saws to slice them off with. More decisions.
]]>
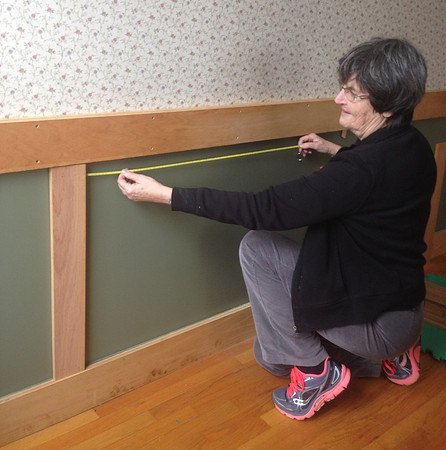 Measuring for Wall #2This puny little tape worked better than holding onto a "real" one. I have lots of real ones at hand.
9. DONE. Admire the work already completed.
10. UNDERWAY: There is a section of baseboard that is not screwed to the wall.
- Cogitate on how to screw it, realizing that it requires a #6 screw hole, a smaller screw hole into the masonite, and a countersink. All to be done with the drill, sometimes resting on the floor. (both me and the drill. The good news is that the drill holes for this are already marked.
- Decide on a 1 1/2" screw.
- Realize that the chuck on the drill will not open. Cogitate on that. It is really humiliating when you can't figure out the simple stuff.
- Realize that the drill will not run. Plug it in. Go have breakfast.
- Discover that the forward/backward button is in neither position. Fix that. The drill starts, the chuck opens. There is too much to know!!
- Change the bit and drill the missing holes. Insert the smaller bit and drill into the masonite. Oh, this is going well.
- Think about the countersink thing. Why do we not have 20 or 30 of these bits? Yesterday we tested the one marked #6 and it is too big. I try a 1/4" bit and it seems dull -- turns out to be too small anyway, and if I had been bright enough I would have just used the bit from the drill press, but I don't want to change that until I am done drill pressing.
- Muddle a little more and decide to tackle another part of the project.
11. DONE: Measure for the positioning of the next 4 stiles.
Trish helped me with the spacing of the stiles on wall #2, and eventually we get it right -- I still think this is the hardest part. (It is also humiliating to need a pencil to divide 118 by 4. School kids today can do that in their head).
This is not a lot of shout about, but not bad for the time available. Tomorrow should show some real progress. Fingers crossed I do not fall amok of the stupidness factor.
]]>
Thanks to Brian for dropping by with advice and assistance. I learned a few things, found a few things, learned a few things I have to find to simplify the process. However, to get right to the point. By mid-afternoon, thanks to a good start with cutting and drilling, I have the stiles installed in one whole wall.
 GREAT STARTThose 5 boards were placed, levelled and screwed on the wall by ME!!
PROGRESS:
5. Decide about the angled corners, one board or two.
Methinks this will look better with two, and may be possible without even cutting a beveled edge.
Me has re-thought. One board it is. To make a balanced placement one board on those corners is the only way it will look right. One big lesson from all this, thanks to Brian's wisdom, is "It's all about compromise." Here I was trying to make everything come out perfectly, and that is impossible. It's a matter of balancing the possible with the doable, and in my current view, taking note that some bits of the space that will be behind a big chair anyway. I think that is why Harvey did not finish so many projects (and myself as well if I am honest). Once it moves away from perfect, we get frustrated trying to fix it, and lose interest. That's really an important lesson.
6. Mark the measurements for placement
This is likely the most important job. We spent a lot of time moving boards around and eyeing the result. How to handle the angled corners; what to do under the windows and beside the windows; working in the seams in the masonite. I think we did ok. It won't be perfect, but nobody will know the difference.
7. Drag out the table saw.
Slicing off the sliver from the bottom of the boards was done by Brian on the table saw. I will have to do that with the next batch. What I learned was where the on-off switch is. That will be a big help.
8. Learn how to use the drill press. Practice.
My practice will come tomorrow, but I got the lesson in how the drill press works, and what bits to use, and what bit is missing of course -- it's always the one you really need. Also learned how to do it when you don't have the right bit. Also learned that unlike the lesson on YouTube, it is NOT necessary to clamp your work.
 CountersinkingElectric tape marks the depth. Would you believe I do not have a right-sized bit that does that! I most likely do -- finding it is the issue.
 This is a good guy!Checking the drills; getting ready for the 'how-to`' demo.
9. Drill and screw.
Brian drilled 5 posts for the
 Self-explanatoryI think I might learn to like this!
end wall. I got a quick demo of how to level, then drill the pilot holes through the masonite, and then screw them on. Ya gotta love electric tools.
Self-explanatoryI think I might learn to like this!
end wall. I got a quick demo of how to level, then drill the pilot holes through the masonite, and then screw them on. Ya gotta love electric tools.
I finished later in the afternoon. Yes. I am impressed with myself!!
]]>
Nothing like getting right onto it. Otherwise, somebody might suggest you should be drilling instead of blogging.
- DONE: Clean all the junk out of the room; give away big old TV
Looks worse than it is. Of course, now the front hall looks worse than it was. I suppose I should be grateful for a large and formerly uncluttered foyer.
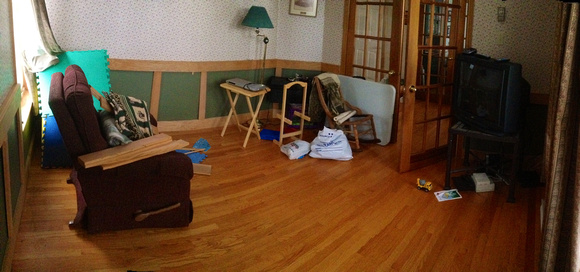 Emptying the spaceThis was a TV room and a toy space for the grandchildren. The easy chair will go back upstairs when some able bodies appear.
BEFORE
Emptying the spaceThis was a TV room and a toy space for the grandchildren. The easy chair will go back upstairs when some able bodies appear.
BEFORE
 Emptied outReady to get down to the hard stuff.
AFTER
Emptied outReady to get down to the hard stuff.
AFTER
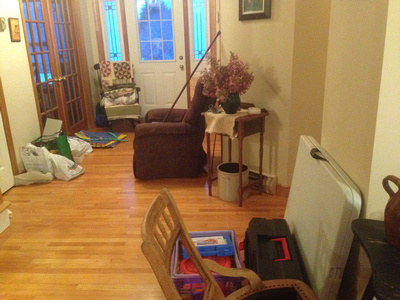 Reorganized ClutterFacetime reality: When Ella, age almost 4, realized that I had cleaned out the room where she plays in the summer, demanded to see her toys.
AFTER also
2. DONE: Figure out what size screws - find the screws.
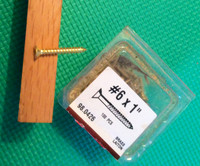 These will do it!There are a lot of #6 screws in Screw Heaven
Not ready for screws yet, but could not resist a hunt in Screw Heaven. However, I learned from my mentor, Brian, that you do not use brass screws for such a job, since the heads can snap off if for some reason the screw gets stuck. I absolutely do not want any missing heads associated with this project. Fortunately, digging deeper into Screw Heaven revealed some normal #6 x 1" screws.
I will add suspense to this blog by NOT including an image of Screw Heaven just yet.
3. DONE: Charge up the power drills
 Ready for Work
A little ahead of the story with this one, too, but yesterday Austin and I found two (yes 2) working charged drills, c/w charger!! Hopefully they are up to the job.
4. NOT DONE, BUT ADEQUATELY RANTED OVER: Find a temporary table or shelf for the Fibre Op cords and related techno-stuff.
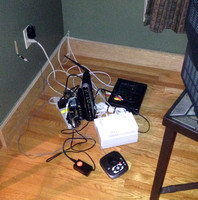 BEFOREFibre-Op Entanglement
This is rant-worthy, right?
BEFOREFibre-Op Entanglement
This is rant-worthy, right?
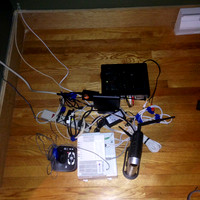 AFTER After half an hour of sorting and unravelling
Was it worth the time. I don't think so.
AFTER After half an hour of sorting and unravelling
Was it worth the time. I don't think so.
If it were my nature to rant, I would have ranted long ago about the messy array left in the corner of my room by Aliant when the Fibre Op was installed. I have since so many tidy installations in people's basements. I have no clue why I was chosen for this method of service; and now that I no longer want a TV in this room, I still need the set-top box connected here in order for the wireless TV to work in the rest of the house. Time to kill TV I think, and get rid of a couple of the pieces of FibreOp-ness.
The really sad part of this, is that I spent half an hour sorting out cords and tying them up, and the whole thing did not look one bit better.
And so the day ends with some actual progress and lots to think about. Brian has kindly offered to drop by tomorrow to get me started. Also, I have had offers of help from a few others. Very heartwarming on all fronts.
]]>Great news is that I've had an offer of help from someone who knows how to do this stuff. Power saw, drill press, here I come! This plan may change a bit when I get some expert opinion.
Clean all the junk out of the room; give away big old TV
Figure out what size screws - find the screws.
Charge up the power drills
Find a temporary table or shelf for the Fibre Op cords and stuff.
Bring in the chop saw. Slice off a sliver from the too-long boards
Decide about the angled corners, one board or two
Mark the measurements for placement
Learn how to use the drill press. Practice.
Drill all the holes.
Find a bit of plywood and make missing piece of baseboard.
Sand away the pencil marks, and any other sanding that needs to be done, edges, etc.
Sand baseboard and top board
Place each board; drill hole through masonite; screw and countersink.
Measure for odd size boards around windows and doors.
Practice with table saw.
Cut and install odd-sized boards.
Decide upon what type of molding for the bottom, and how it will be installed.
Buy it, cut it, fasten it on.
Fill all the screw holes with putty or plugs.
Find the chair rail and get more if not enough.
Figure out how to fasten it on, and install it. (Mitres!)
Varnish.
Box cover for cable wire
]]>
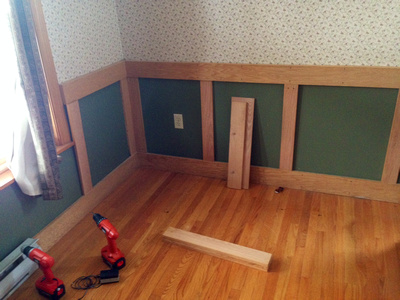 Starting pointThe top and bottom are attached, only the corner vertical boards are attached.
When I was cleaning in the basement last summer, he cautioned me not to get rid of any oak, because all the pieces for the living room were down there cut out. At the time I could not find them, but I have subsequently uncovered them. They lay buried in the basement under piles of kayak parts and cedar dust, and indeed they are mostly cut to length with the screw holes pencilled in.
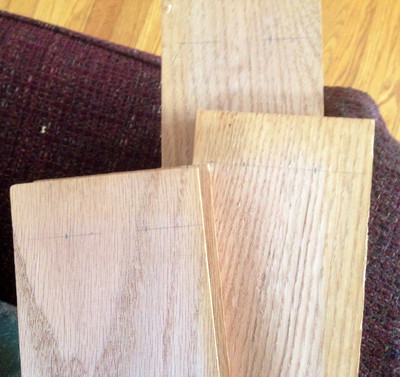 Hard Part is DoneHarv marked all the locations for the screw holes.
 Molding will go hereI will have to figure out how to carve cove molding or some other fancier stuff to fit around these posts.
So what do you think? Can I recall, or learn anew, how to use the host of tools around here, and actually do this job myself? Until now, it has been the farthest thing from my mind, just a source of annoyance - another undone thing around the house.
Molding will go hereI will have to figure out how to carve cove molding or some other fancier stuff to fit around these posts.
So what do you think? Can I recall, or learn anew, how to use the host of tools around here, and actually do this job myself? Until now, it has been the farthest thing from my mind, just a source of annoyance - another undone thing around the house.