

Welcome to my Zenfolio blog which may or may not materialze into anything meaningful. It got started to keep me at a project to finish the panelling in my TV room.
I am not at all happy about how this blog formats, so I apologize for the weird fonts and sizes that appear. There is nothing at all logical about how it goes together.
Living Room Panelling - Feb 2 - On my own
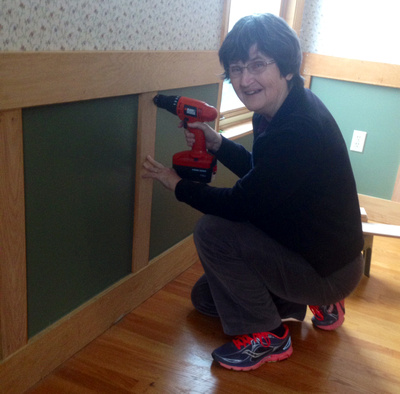
It's one thing to watch and learn, quite another to actually do something. Yesterday, however, I managed to be "on my own" for 5 boards worth of installation -- let's see how it goes today. Not a lot of time available, but here goes.
 Measuring for Wall #2This puny little tape worked better than holding onto a "real" one. I have lots of real ones at hand.
9. DONE. Admire the work already completed.
10. UNDERWAY: There is a section of baseboard that is not screwed to the wall.
- Cogitate on how to screw it, realizing that it requires a #6 screw hole, a smaller screw hole into the masonite, and a countersink. All to be done with the drill, sometimes resting on the floor. (both me and the drill. The good news is that the drill holes for this are already marked.
- Decide on a 1 1/2" screw.
- Realize that the chuck on the drill will not open. Cogitate on that. It is really humiliating when you can't figure out the simple stuff.
- Realize that the drill will not run. Plug it in. Go have breakfast.
- Discover that the forward/backward button is in neither position. Fix that. The drill starts, the chuck opens. There is too much to know!!
- Change the bit and drill the missing holes. Insert the smaller bit and drill into the masonite. Oh, this is going well.
- Think about the countersink thing. Why do we not have 20 or 30 of these bits? Yesterday we tested the one marked #6 and it is too big. I try a 1/4" bit and it seems dull -- turns out to be too small anyway, and if I had been bright enough I would have just used the bit from the drill press, but I don't want to change that until I am done drill pressing.
- Muddle a little more and decide to tackle another part of the project.
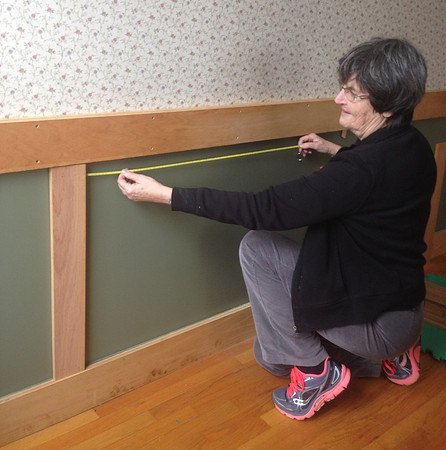
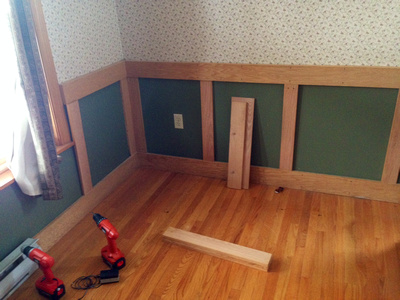
11. DONE: Measure for the positioning of the next 4 stiles.
Trish helped me with the spacing of the stiles on wall #2, and eventually we get it right -- I still think this is the hardest part. (It is also humiliating to need a pencil to divide 118 by 4. School kids today can do that in their head).
This is not a lot of shout about, but not bad for the time available. Tomorrow should show some real progress. Fingers crossed I do not fall amok of the stupidness factor.
Living Room Panelling - Feb 1 - Underway
So much kindness in my world.
Thanks to Brian for dropping by with advice and assistance. I learned a few things, found a few things, learned a few things I have to find to simplify the process. However, to get right to the point. By mid-afternoon, thanks to a good start with cutting and drilling, I have the stiles installed in one whole wall.
 GREAT STARTThose 5 boards were placed, levelled and screwed on the wall by ME!!
PROGRESS:
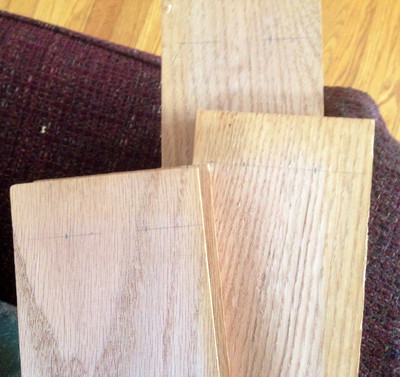
5. Decide about the angled corners, one board or two.
Methinks this will look better with two, and may be possible without even cutting a beveled edge.
Me has re-thought. One board it is. To make a balanced placement one board on those corners is the only way it will look right. One big lesson from all this, thanks to Brian's wisdom, is "It's all about compromise." Here I was trying to make everything come out perfectly, and that is impossible. It's a matter of balancing the possible with the doable, and in my current view, taking note that some bits of the space that will be behind a big chair anyway. I think that is why Harvey did not finish so many projects (and myself as well if I am honest). Once it moves away from perfect, we get frustrated trying to fix it, and lose interest. That's really an important lesson.
6. Mark the measurements for placement
This is likely the most important job. We spent a lot of time moving boards around and eyeing the result. How to handle the angled corners; what to do under the windows and beside the windows; working in the seams in the masonite. I think we did ok. It won't be perfect, but nobody will know the difference.
7. Drag out the table saw.
Slicing off the sliver from the bottom of the boards was done by Brian on the table saw. I will have to do that with the next batch. What I learned was where the on-off switch is. That will be a big help.
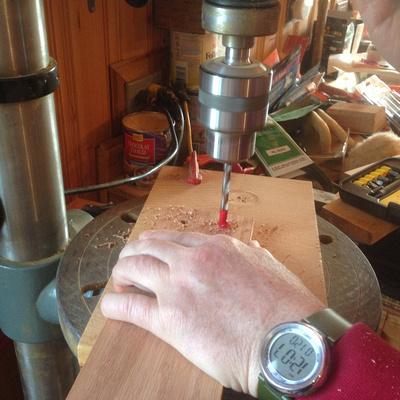
8. Learn how to use the drill press. Practice.
My practice will come tomorrow, but I got the lesson in how the drill press works, and what bits to use, and what bit is missing of course -- it's always the one you really need. Also learned how to do it when you don't have the right bit. Also learned that unlike the lesson on YouTube, it is NOT necessary to clamp your work.
 CountersinkingElectric tape marks the depth. Would you believe I do not have a right-sized bit that does that! I most likely do -- finding it is the issue.
 This is a good guy!Checking the drills; getting ready for the 'how-to`' demo.
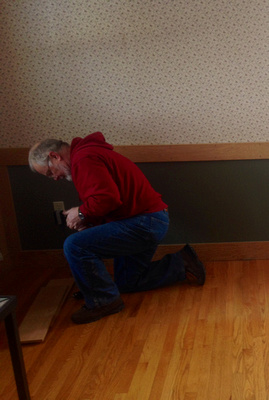
9. Drill and screw.
Brian drilled 5 posts for the
 Self-explanatoryI think I might learn to like this!
end wall. I got a quick demo of how to level, then drill the pilot holes through the masonite, and then screw them on. Ya gotta love electric tools.
Self-explanatoryI think I might learn to like this!
end wall. I got a quick demo of how to level, then drill the pilot holes through the masonite, and then screw them on. Ya gotta love electric tools.
I finished later in the afternoon. Yes. I am impressed with myself!!
Living Room Panelling - Jan 31 -Getting Started
Jan 31, 2016
Nothing like getting right onto it. Otherwise, somebody might suggest you should be drilling instead of blogging.
- DONE: Clean all the junk out of the room; give away big old TV
Looks worse than it is. Of course, now the front hall looks worse than it was. I suppose I should be grateful for a large and formerly uncluttered foyer.
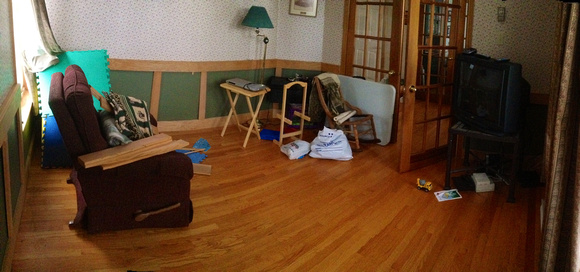 Emptying the spaceThis was a TV room and a toy space for the grandchildren. The easy chair will go back upstairs when some able bodies appear.
BEFORE
Emptying the spaceThis was a TV room and a toy space for the grandchildren. The easy chair will go back upstairs when some able bodies appear.
BEFORE
 Emptied outReady to get down to the hard stuff.
AFTER
Emptied outReady to get down to the hard stuff.
AFTER
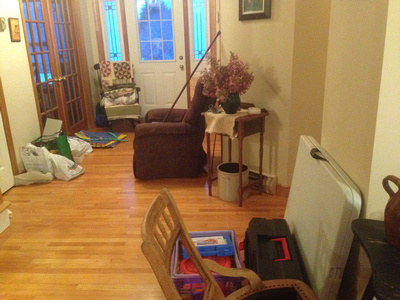 Reorganized ClutterFacetime reality: When Ella, age almost 4, realized that I had cleaned out the room where she plays in the summer, demanded to see her toys.
AFTER also
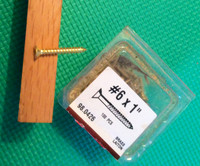
2. DONE: Figure out what size screws - find the screws.
 These will do it!There are a lot of #6 screws in Screw Heaven
Not ready for screws yet, but could not resist a hunt in Screw Heaven. However, I learned from my mentor, Brian, that you do not use brass screws for such a job, since the heads can snap off if for some reason the screw gets stuck. I absolutely do not want any missing heads associated with this project. Fortunately, digging deeper into Screw Heaven revealed some normal #6 x 1" screws.
I will add suspense to this blog by NOT including an image of Screw Heaven just yet.
3. DONE: Charge up the power drills
 Ready for Work
A little ahead of the story with this one, too, but yesterday Austin and I found two (yes 2) working charged drills, c/w charger!! Hopefully they are up to the job.
4. NOT DONE, BUT ADEQUATELY RANTED OVER: Find a temporary table or shelf for the Fibre Op cords and related techno-stuff.
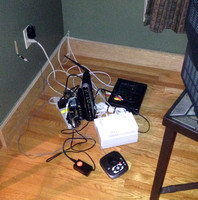 BEFOREFibre-Op Entanglement
This is rant-worthy, right?
BEFOREFibre-Op Entanglement
This is rant-worthy, right?
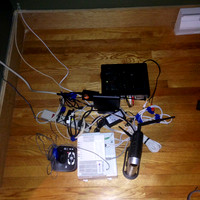 AFTER After half an hour of sorting and unravelling
Was it worth the time. I don't think so.
AFTER After half an hour of sorting and unravelling
Was it worth the time. I don't think so.
If it were my nature to rant, I would have ranted long ago about the messy array left in the corner of my room by Aliant when the Fibre Op was installed. I have since so many tidy installations in people's basements. I have no clue why I was chosen for this method of service; and now that I no longer want a TV in this room, I still need the set-top box connected here in order for the wireless TV to work in the rest of the house. Time to kill TV I think, and get rid of a couple of the pieces of FibreOp-ness.
The really sad part of this, is that I spent half an hour sorting out cords and tying them up, and the whole thing did not look one bit better.
And so the day ends with some actual progress and lots to think about. Brian has kindly offered to drop by tomorrow to get me started. Also, I have had offers of help from a few others. Very heartwarming on all fronts.
Living Room Panelling - Here's the Plan
Here's the plan. The more scary bits are in green.
Great news is that I've had an offer of help from someone who knows how to do this stuff. Power saw, drill press, here I come! This plan may change a bit when I get some expert opinion.
Clean all the junk out of the room; give away big old TV
Figure out what size screws - find the screws.
Charge up the power drills
Find a temporary table or shelf for the Fibre Op cords and stuff.
Bring in the chop saw. Slice off a sliver from the too-long boards
Decide about the angled corners, one board or two
Mark the measurements for placement
Learn how to use the drill press. Practice.
Drill all the holes.
Find a bit of plywood and make missing piece of baseboard.
Sand away the pencil marks, and any other sanding that needs to be done, edges, etc.
Sand baseboard and top board
Place each board; drill hole through masonite; screw and countersink.
Measure for odd size boards around windows and doors.
Practice with table saw.
Cut and install odd-sized boards.
Decide upon what type of molding for the bottom, and how it will be installed.
Buy it, cut it, fasten it on.
Fill all the screw holes with putty or plugs.
Find the chair rail and get more if not enough.
Figure out how to fasten it on, and install it. (Mitres!)
Varnish.
Box cover for cable wire
Living Room Panelling - Thinking about it.
This blog will track the progress of my attempt to finish panelling the Living Room. The back story is below.
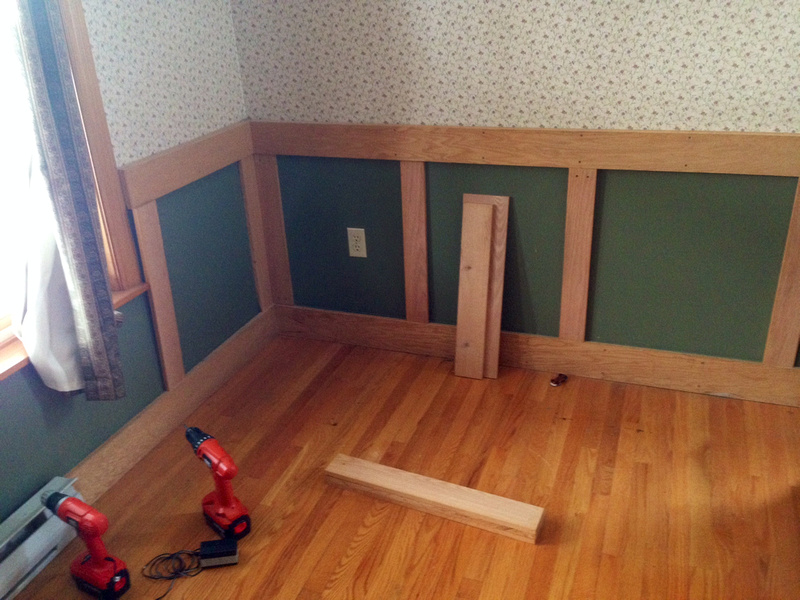
 Starting pointThe top and bottom are attached, only the corner vertical boards are attached.
When I was cleaning in the basement last summer, he cautioned me not to get rid of any oak, because all the pieces for the living room were down there cut out. At the time I could not find them, but I have subsequently uncovered them. They lay buried in the basement under piles of kayak parts and cedar dust, and indeed they are mostly cut to length with the screw holes pencilled in.
 Hard Part is DoneHarv marked all the locations for the screw holes.
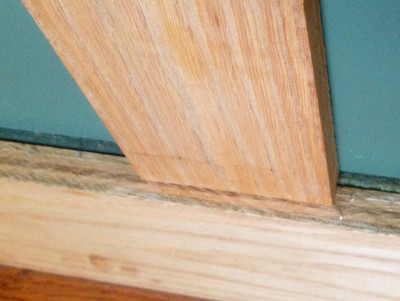 Molding will go hereI will have to figure out how to carve cove molding or some other fancier stuff to fit around these posts.
So what do you think? Can I recall, or learn anew, how to use the host of tools around here, and actually do this job myself? Until now, it has been the farthest thing from my mind, just a source of annoyance - another undone thing around the house.
Molding will go hereI will have to figure out how to carve cove molding or some other fancier stuff to fit around these posts.
So what do you think? Can I recall, or learn anew, how to use the host of tools around here, and actually do this job myself? Until now, it has been the farthest thing from my mind, just a source of annoyance - another undone thing around the house.